Insulation

The Basics of Insulation Removal

Perth Insulation Removal involves removing old insulation, sanitizing the space, and preparing it for new installation. It’s especially important in crawl spaces, which are prone to moisture and pests that can impact insulation.Insulation

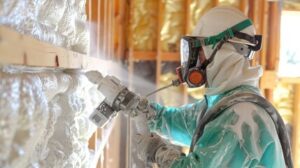
It’s a challenging project that requires specialized skills and equipment. It’s also essential to wear proper protective equipment.

Insulation removal isn’t a straightforward task. The insulation itself may contain asbestos or mold, and the removal process can spread these contaminants into the air. This is why it’s important to monitor air quality, especially when performing the work yourself. This will ensure that the air quality is healthy and that the contaminants aren’t spreading throughout the home.

In addition to monitoring air quality, homeowners should follow local regulations and take precautions when disposing of their old insulation. This includes taking samples and having them tested by a lab to ensure that no harmful elements are in the air. The insulation also needs to be disposed of in designated facilities that are equipped to handle hazardous waste. This prevents environmental contamination and ensures that the materials don’t end up in landfills.

Before the insulation removal begins, it’s important to prepare the space for safe working conditions. This can be done by clearing out items in the attic and ensuring that there are clear pathways. It’s also a good idea to lay down boards or tarps to protect floors and walls.

Finally, it’s essential to wear proper PPE during the procedure. This will include gloves, eye protection, and a dust mask. The dust from the insulation can irritate the skin, eyes, and respiratory system. Wearing a mask will prevent the particles from entering the body and causing damage.

In addition to removing old insulation, homeowners should use this opportunity to seal air leaks. This will improve energy efficiency and reduce utility bills. It will also increase the resale value of the home and make it more attractive to eco-conscious buyers. Moreover, it will help to prevent moisture buildup and pest infestation.

Preparation

Insulation removal requires proper preparation to ensure safety and effectiveness. A thorough knowledge of the insulation type and how it is installed helps prepare for the process. For example, blown-in insulation needs special equipment to remove it, including a high-powered vacuum that can be rented from hardware stores. Foam board is typically easier to handle but may require a cutting tool for some areas. Also, it is important to wear gloves and long sleeves to prevent skin irritation.

A thorough inspection of the attic area is a good place to start. It is critical to check for any signs of moisture or pests and to seal any cracks. The attic should also be ventilated to avoid moisture buildup.

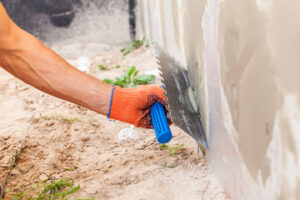
In addition to inspecting the attic, it is also important to assess the walls for rot or water damage. These problems can affect the integrity of the structure and lead to moisture or mold growth, which can be a health risk for the home’s residents.

Finally, it is important to check that electrical wiring and plumbing are in good condition. This will help reduce the chance of damage during the insulation removal process and ensure that any problems are addressed before installing new insulation.

When performing insulation removal, it is important to turn off the power and disconnect any live wires in the attic or wall cavities. This will reduce the risk of damaging any electrical systems and minimize the potential for shocks or injuries. It is also advisable to wear appropriate PPE and to collect insulation in sealed bags to prevent fibers from escaping. In addition, contaminated insulation must be properly disposed of following local regulations.

Tools

When performing insulation removal, the right tools make all the difference. Whether you’re working with blown-in cellulose or fiberglass batts, or even foam board insulation, having the right tools and equipment can help streamline the process. Having the right equipment can also make it easier to avoid contamination and ensure safety.

Before starting, it’s important to understand the different types of insulation and their unique characteristics. For example, cellulose has a distinctive fluffy texture that requires special handling to avoid skin irritation. Foam board insulation, on the other hand, is rigid and may require cutting tools for effective removal. Before performing an insulation removal, it’s important to clear the workspace and use plastic sheeting to isolate areas. This will reduce the risk of contamination and prevent the spread of dust and debris. Proper ventilation is also essential to keep your work area clean and safe.

To effectively remove loose-fill insulation, a vacuum designed for insulation removal is necessary. This type of vacuum has a high-powered suction nozzle that helps remove material quickly and thoroughly. A hose extension wand extends the reach of the nozzle, making it easy to get into tight spaces and hard-to-reach corners. It’s also essential to wear a mask and gloves to protect yourself from inhaling dust particles.

Other necessary tools include a ladder for attic access and a hard-hat to protect yourself from falling objects or nails. A HEPA filter attachment is also useful for minimizing dust and airborne particles. Finally, a utility knife is useful for cutting off oversized fiberglass batts. Once all the insulation is removed, it should be placed in garbage bags and taken to a local waste management center for disposal.

Time

Insulation isn’t designed to last forever, and it is a good idea to replace old insulation in your attic or crawl space with new materials. This can improve energy efficiency and prevent problems with temperature and air quality. Several indicators can indicate that your attic or crawlspace insulation needs to be replaced, including a rise in your heating and cooling bills, visible signs of mold or pests, and unpleasant odors.

Before beginning the insulation removal process, it’s important to follow proper safety precautions. Wearing protective clothing and taking regular breaks can help to avoid fatigue and overexposure to harmful particles. Additionally, the attic space should be properly vaccuumed and cleaned to ensure that there are no contaminants left behind.

If the old insulation is contaminated with rodent droppings or mold, you will need to hire a specialized professional to handle the cleanup and decontamination processes. This will include a thorough inspection, identifying any mold or rodent infestations, and cleaning and sanitizing the area.

Depending on the type of insulation, it may also be necessary to perform asbestos testing and removal. This requires additional specialized equipment, as well as special procedures for preventing contamination of the surrounding home. If you suspect that your insulation contains asbestos, it is best to have a professional handle the removal and disposal process.

After removing the old insulation, it is crucial to thoroughly clean and vacuum the attic space to remove any remaining debris or dust. This can make a significant difference in your home’s indoor air quality, as dust and allergens will no longer be trapped within the insulation. Once the attic is clean, you can begin preparing it for the installation of your new insulation.

Cost

The cost of insulation removal varies depending on the type and condition of the old insulation. Batt and roll insulation can be removed with a shop vac, but blown-in insulation needs a professional vacuum. This type of insulation can be difficult to remove without damaging the existing structure of the attic. The price of insulation removal can also vary based on the amount of material that needs to be removed. Typically, it costs $1 to $4 per square foot to remove and install new insulation.

Removing old and damaged insulation can save you money on energy bills and improve your home’s comfort. It can also raise your resale value, especially if you choose to sell the home later on. Having clean, up-to-date insulation is attractive to environmentally conscious buyers.

If you decide to remove the insulation yourself, it’s important to follow local regulations for disposal. This will prevent contamination and protect the health of residents. It’s also a good idea to use an air quality monitor during the process, as there is a risk that contaminants will become airborne. These contaminants may include mold spores, rodent droppings, or vermiculite, which may contain asbestos.

If you hire a professional to do the job, they can use a high-powered industrial vacuum that will remove the insulation quickly and safely. They can also help you find the best type of replacement insulation for your home. The new insulation will keep your house cool in the summer and warm in the winter, which will save you money on your energy bills. It will also increase your resale value and make your home more comfortable. Insulation removal can also provide a clearer view of the attic and roof structure, which will allow for more effective pest control and rodent proofing.

Liquid Waste Removal Processes

The manufacturing and production industries generate hazardous and non-hazardous liquid waste. If it isn’t disposed of properly, the ecosystem will suffer and businesses could face significant liabilities.

Inadequate disposal can also contaminate water sources that people use for drinking and cause various health risks. Liquid waste is typically stored in tanks, lagoons and ponds. Click the Liquid Waste Removal Perth to learn more.

The Definitive Guide to Liquid Waste Disposal | Shapiro

The dewatering process involves separating liquids from solids to reduce the volume of waste. This step is an essential part of managing liquid waste because it allows for smaller, more manageable volumes to be transported and treated. It also ensures that your company is following regulations regarding the handling of hazardous wastes and non-hazardous liquids.

The first step is to identify the type of liquid waste you’re dealing with. This will help you decide which treatment or disposal method to use. Wastewater is a common type of liquid waste that comes from households and businesses. It contains organic matter, chemicals, and pathogens, so it’s important to treat and dispose of it correctly. Chemical waste is another common type of liquid waste. This includes solvents, paints, pesticides, and other industrial chemicals. It’s important to handle this type of liquid waste with care as it can be toxic to humans and the environment.

Once you’ve identified the type of liquid waste you’re working with, it’s time to separate it into its different components. This helps minimize the risk of accidental spills and leaks. It also makes it easier to transport and dispose of the waste.

When it comes to transporting liquid waste, there are several options available. You can place the waste in disposal barrels or bins and take it to an approved dump area. This is one of the simplest methods of liquid waste removal, and it doesn’t require any additional technology or facilities. You can also use professional waste management services to transport the liquid waste for you.

There are a few ways to dispose of liquid waste, including land application, direct/indirect discharge, underground injection, and ocean dumping. Each option has its own benefits and risks. For example, direct/indirect discharge can cause environmental damage to sensitive ecosystems. Ocean dumping is a popular method for disposing of liquid waste, but it’s now regulated to avoid harming marine life.

Liquid waste is an inevitable byproduct of many business and household activities. When it’s not handled and disposed of properly, the consequences can be severe. However, implementing an efficient system for generating, treating, and transporting this waste can protect people and the environment.

Disposal

Disposal of liquid waste involves safe practices and procedures to protect human health, wildlife and infrastructure. Those who don’t follow proper disposal methods can face significant fines and legal action.

Whether at a home, office or manufacturing plant, the way businesses and households handle liquid waste can have a huge impact on the environment. Properly disposing of hazardous liquid waste is key to protecting the environment and ensuring public safety. This is why many facilities hire professional waste management companies to take care of the collection, transportation and disposal of liquid waste.

Before any liquid waste can be disposed of, it must undergo treatment and be treated to ensure that it isn’t dangerous for the environment or humans. Liquid waste treatment involves a variety of different techniques, including physical and chemical methods. Physical methods include sedimentation and filtration, while chemical treatments use chemicals to remove contaminants from liquid waste.

After the liquid waste is treated, it can be disposed of through sewer systems or in designated landfills. Sewage systems are commonly used in urban areas, while septic systems are popular in rural locations. Both systems require regular maintenance and inspections to prevent sewage system overflows, contamination and clogging.

Liquid waste can also be disposed of through incineration. This process involves combusting the waste at high temperatures, which helps to reduce its volume and destroy harmful pathogens. However, incineration releases toxic substances and greenhouse gases into the atmosphere, which can cause air pollution, exacerbate asthma and other respiratory conditions, and contribute to climate change.

Ideally, liquid waste should be recycled or reused wherever possible. This is a sustainable approach that reduces the demand for freshwater resources and can help to protect the environment. Liquid waste recycling and reuse can be achieved through several methods, such as membrane filtration, reverse osmosis and biological processes. These processes also have the potential to turn toxic waste into useful products, such as biogas and water.

Treatment

Liquid waste can be extremely dangerous, posing environmental, health, and economic threats if it is not handled properly. It can also be a source of contamination for watercourses and other natural resources. That’s why it is essential to follow strict disposal methods. Those that don’t take the time to dispose of liquid waste correctly risk fines and penalties.

Non-hazardous liquid waste can come from households, businesses, or industrial activities. It may be organic or inorganic, biodegradable, or chemically reactive and toxic. It can also be flammable, explosive, or corrosive. Examples include grit trap waste, grease trap waste, septic tank pumpings, chemical toilet waste, and municipal wastewater treatment plant sludge.

Hazardous liquid waste comes from manufacturing, oil and gas, mining, and other industrial sectors. It can contain a range of toxic chemicals, including heavy metals. It can be highly dangerous if it seeps into the groundwater or surface water sources, and contaminates them. This can disrupt ecosystems, kill marine life, and cause harm to human beings.

It is important to separate hazardous and non-hazardous liquid waste before it is disposed of. This can help to reduce the risk of cross-contamination and improve the efficiency of disposal measures. Then, the waste can be sent to authorised facilities that are equipped to handle the specific type of liquid waste.

Treatment processes are designed to convert liquid waste into harmless by-products or useful resources. They begin with screening and separation, which involves removing large particles from the liquid waste and separating out non-organic contaminants. This step is usually carried out using gravity-based separators or mechanical separators. It’s also possible to use a mixture of different methods to achieve the best results.

The next step in most cases is anaerobic digestion, which involves putting the waste into an oxygen-free tank where microorganisms digest it to produce methane and other gases that can be used for fuel. In other cases, a dewatering and thickening process is used to reduce the volume of the liquid waste, making it easier to transport and store. It can then be sent to recycling centers or turned into compost.

Recycling

The process of recycling liquid waste involves converting it into usable byproducts or resources. This type of treatment reduces the burden on natural resources and enables safe, responsible disposal. It also minimizes the impact of toxic contaminants on the environment, helping to reduce greenhouse gas emissions and prevent soil contamination. The processes involved in treating liquid waste typically include screening, separation, dewatering, oxidation, reduction and more.

There are four main types of liquid waste: household liquid waste, industrial waste, agricultural waste, and sewage. The former includes products like leftover paint, used motor oil, and cleaning solvents. These contain harmful chemicals that need to be disposed of properly. Industrial waste contains dangerous substances that are often the result of manufacturing or production processes. These require specific and strict treatment processes to ensure that they don’t pollute waterways or harm the ecosystem.

Agricultural liquid waste often includes organic matter such as animal blood and plant materials. This can be decomposed through anaerobic digestion to produce biogas and fertilizers. Sewage is the most common form of sewage, which includes human and animal excrement that is flushed into sewer systems. The resulting waste is often treated using biological methods to remove harmful pathogens and contaminants.

Other methods of treating and dumping liquid waste are incineration, deep well injection, and surface disposal. Incineration is an efficient way to reduce the volume of liquid waste and can help to eliminate odors and bacteria. However, it can create toxic air pollutants and greenhouse gases, so it is important to treat the resulting ash before reusing it. Deep-well injection is a more environmentally friendly method that uses an underground well to inject liquid waste into the ground. It is usually done in conjunction with other treatments to prevent contamination of the surrounding soil.

The best way to handle liquid waste is to recycle and reuse it whenever possible. This can be as simple as bringing your old tupperware and aluminum to centers where it is repurposed into new products. In many cases, it is also possible to recycle liquid waste through processes such as reverse osmosis and UV radiation, which can turn hazardous substances into useful byproducts that can be reused in agriculture and other applications.

Foundation Repair

What You Need to Know About Foundation Repair

Foundation Repair Greensboro NC fixes issues like cracks, leaking, and uneven floors. It also restores the original elevation of a building so that everything works as it should.Foundation Repair

Hairline cracks are a common sign of foundation problems. However, if they grow wider or longer, it’s time to call for help.

Professionals have specialized tools and training, so they can quickly identify the problem and make lasting repairs. They also work efficiently, saving you time and money.

Foundation repair is an important investment, and homeowners need to understand the factors that influence the cost. The extent of damage is the most significant factor, with minor repairs being less expensive than major ones. It’s also possible that the repair process will reveal other issues, such as plumbing leaks or electrical problems, which can add to the overall cost. Choosing a qualified contractor and requesting detailed quotes is essential to ensuring that the project is done right.

The type of foundation and home size are other factors in the overall cost. For example, a poured concrete foundation is more costly to repair than a wood-frame home. Similarly, larger homes are more expensive to repair because they require more materials and equipment.

A structural engineer consultation is often necessary to determine the severity of the problem and recommend the best repair method. This can add between $300 and $1500 to the total cost of the project. Local regulations may require permits and inspections, which can also add to the cost.

If left untreated, a foundation problem can cause serious damage to the structure of your home. It can lead to cracks in walls and floors, sticking doors and windows, and even collapsed ceilings and burst pipes. This can negatively impact your home’s resale value and make it unsafe to live in.

There are several things you can do to help keep foundation repair costs down, including repairing minor cracks promptly and scheduling the work during off-peak times. You can also reduce costs by implementing a proactive approach to foundation maintenance and taking steps to mitigate soil movement. This includes choosing appropriate landscaping, directing water away from the home, and addressing drainage problems.

Some financing options are available for foundation repairs, including home equity loans. However, it’s important to weigh the pros and cons of these loans before deciding to use them for this purpose. It’s also important to find a contractor that offers flexible payment terms and competitive rates. This can help you manage your budget and avoid paying for interest on money that you don’t need.

Repair Methods

Several different methods are used for repairing foundation issues, each with its own advantages and considerations. The extent of the damage, soil conditions, and wall configurations will determine which method is best for your home. Repair methods can range from minor crack sealing to a complete rebuild of the foundation. A qualified inspector can help you choose the right repair method for your needs.

Cracks in the foundation walls can be patched with hydraulic cement, vinyl concrete, epoxies, or silicone or polyurethane sealers to stop water seepage and further damage. This is a relatively inexpensive option and usually doesn’t require major excavation or landscaping disturbances.

If your foundation is sinking, a foundation repair contractor can install steel piers underneath your house to support it. These piers are long, steel rods that are driven into the ground until they reach stable soil or bedrock. They can be driven into the soil without disturbing existing structures, are able to bear significant loads, and are suitable for most upper-soil conditions.

Other repair methods include underpinning, which involves excavating and strengthening the existing foundation by transferring its load to deeper soil or bedrock. This method is typically used in situations where the original foundation has failed due to shifting or movement of the surrounding soil.

Another option is to replace the existing foundation with a new concrete foundation, which is often more expensive than other repair methods. However, this method is highly effective and can provide lasting stability.

Sagging girder beams can be shimmed or replaced to increase their strength and restore the structural integrity of your home. Repairing or replacing these beams will also help prevent further deterioration and improve the appearance of your home’s exterior.

Pay attention to sloping floors, which are a common sign of foundation problems. Your floors should be level and even, so any noticeable sloping could indicate that your foundation has shifted unevenly. You can check the slope of your floors by rolling a ball across them or using a level. Sagging doors and windows are also a red flag, as they may not close or open properly. If you notice any of these issues, it is important to get a professional inspection as soon as possible.

Contractors

Foundation repair is a necessary step to maintaining the structural integrity and overall stability of a building. Various factors like soil movement, water damage, and poor construction can cause foundation issues that need to be addressed right away. Taking the time to identify and address these problems can prevent them from becoming bigger, more costly issues down the road. It also helps preserve or even boosts property value.

Whether your home has a concrete slab or a pier and beam foundation, you should always be vigilant about signs of foundation problems. These can include cracks in walls and floors, leaning chimneys, or sloping or uneven floors. Identifying these signs early on can help you avoid more expensive structural problems down the road.

It’s important to work with a professional foundation repair contractor who can provide a comprehensive solution that addresses your specific needs. In addition to addressing the structural integrity of your home, they can advise you on other preventative measures that can save you money and protect your investment.

The type of foundation and extent of the damage will influence the cost of the repair. For example, minor cracks in the foundation typically require less material and labor than major structural issues. In addition, the size of your home will affect the price as larger homes require more materials and labor to repair.

A good foundation repair contractor will carefully evaluate your home to determine the cause of the problem and recommend the best solution. Typical repair methods include epoxy injection, piering, and underpinning. Piering involves installing steel or concrete pilings beneath the foundation to transfer the weight of your house to a more stable soil layer. Underpinning is similar to piering but uses concrete blocks instead of steel piers.

Proper drainage is essential to a healthy foundation. A poorly functioning gutter system can lead to water pooling near the foundation, causing it to expand and weaken the structure. Regularly cleaning your gutters and ensuring that the ground slopes away from your foundation can help prevent water infiltration. Additionally, keeping trees and large shrubs trimmed can prevent them from growing into your foundation or disrupting the soil around it.

Warranty

Investing in foundation repair is an important step to protect your home’s structural integrity and increase its value. While the upfront cost can be significant, addressing foundation issues early on prevents further damage and saves money in the long run.

Signs that you may have foundation problems include cracks in walls or floors, doors and windows that don’t close properly, and uneven or sagging floors. The longer you wait to address these problems, the more severe and costly the repairs will become. A professional will be able to identify and diagnose the issue, recommend the best solution, and perform the necessary work to correct it.

When choosing a foundation repair contractor, you should choose one with extensive experience and knowledge of the various methods of repair. Ensure that they’re licensed and insured, and ask for references from previous customers to assess the quality of their work. You should also consider whether the company offers financing options to ease the financial burden and make the project more manageable.

A warranty is an indication that the foundation repair contractor stands behind the quality of their work and materials. The length of a warranty can vary depending on the method used and the underlying issue addressed. For example, steel piles typically have a lifetime warranty but concrete and helical tiebacks have a limited lifetime warranty.

However, it’s important to note that no foundation repair is permanent. Even with the best work, there’s always a possibility that other parts of your home will settle in the future. This is because the soil underneath your house is constantly changing. However, addressing any water or drainage issues can reduce the risk of further settlement by lowering the area around your foundation to less reactive soils.

If you decide to sell your home in the future, a transferable warranty will be attractive to prospective buyers. It will give them peace of mind that any future foundation issues will be covered, which can help mitigate potential concerns and increase the value of your home.

How AC Repair Can Save You Money

Air conditioning systems rely on regular maintenance to work efficiently and effectively. A professional can catch and fix small issues before they become bigger problems.

Air conditioning maintenance involves inspecting the system to identify signs of wear and tear, servicing what needs service, and repairing any components. This helps restore the AC to full functionality. Click the AC Repair Orlando to learn more.

AC Repairs: Why You Should Leave These 3 Jobs to Professionals | Blog

Refrigerants are a must-have for cooling your home, but they’re not indestructible. Like any machine, they can experience a certain amount of wear and tear over time, resulting in cracks and leaks. A few key signs of refrigerant leaks include puddles on the ground, hissing sounds from inside your home, and low airflow.

There are several common causes of refrigerant leaks, including vibration, corrosion, and weakened rubber seals around valves. Even the most thorough AC maintenance can’t prevent these issues entirely, but it does help.

The evaporator coils in an AC unit are notorious for leaking, especially at the “U” bends and welded joints. These areas are susceptible to mechanical vibrations, which can cause the copper pipes to rub against each other. This creates formic acid, which eats away at the pipe over time, eventually creating a leak.

Leaks can also occur from straight-up physical damage. If you’ve recently had any major construction work done on your home, the copper lines for your AC could have been accidentally ripped or cut during the renovation. The vibrations from these activities can stress welds and joints, causing them to crack or break.

Another common issue is poor installation, which can result in a lack of proper insulation for the pipes. This leads to hot spots, which aren’t conducive to the proper functioning of an air conditioner. These problems are easy to spot, but the right HVAC technician can fix them easily and affordably.

One final reason to watch out for leaking refrigerant is that the R-22 coolant used by older model air conditioning systems has been discontinued. As a result, the supply is dwindling and prices are increasing. This means it may be time to upgrade your air conditioner.

If you think you have a refrigerant leak, you should call an HVAC professional as soon as possible. They’ll find and repair the leak, then restore the correct level of refrigerant to your system. This is far safer and more effective than simply adding refrigerant, which can make the problem worse. Plus, recharging your AC with the incorrect refrigerant can damage it or make it unresponsive.

Faulty Components

When the temperature is high, it’s essential that your air conditioner is working properly. This is why professional maintenance and annual inspections are so important. Whether you have a standard or ductless system, the highly skilled technicians at King know how to spot potential issues before they become serious problems.

A common AC repair issue involves the fan or condenser unit. If you notice that there are strange noises or smells coming from these components, it’s time to call in a technician. It may be a sign that they are damaged or that there’s an electrical problem.

One of the most common problems that require immediate AC repairs is a tripped circuit breaker or blower belt. It’s a simple fix, but it’s important to turn off your AC and call a professional if this occurs. This prevents any further damage to the system and helps reduce the chance of further breakdowns in the future.

Another common AC repair problem is low refrigerant. This is often caused by a faulty sensor that causes the compressor to believe that it is not receiving enough cooling power. This can be corrected with a reprogramming of the thermostat, but it’s best to have this repaired by a professional.

It’s also possible that your air conditioning unit has a loose or dirty coil. Dirty coils can cause the compressor to overheat and fail, resulting in reduced cooling capacity and higher energy bills. In order to avoid this, make sure to regularly clean your air conditioner’s outdoor unit and keep surrounding vegetation trimmed back.

The evaporator coil in your air conditioner works similarly to a sponge in that it absorbs heat from the home’s air and then releases it outdoors. If this coil is covered in dust or other debris, it can block the flow of refrigerant and reduce the cooling capabilities of your air conditioner. While you can remove some of this debris yourself by hosing down your unit and brushing the outside of it, this is often a job best left to a professional AC repair technician.

Worn Bearings

Bearings wear out for a variety of reasons. Insufficient lubrication is one common cause. This causes the bearings to work harder to overcome friction, which shortens their lifespan. A lack of lubrication can also increase the temperature of a bearing, which can damage it further. Slight shaft misalignment can also force bearings to deal with loads that they weren’t designed for, reducing their lifespan.

Unusual squeaking noises are another sign of worn bearings. This is most often seen in motor bearings, and it occurs when the bearings are working too hard to compensate for an imbalance in load zones. The resulting friction causes a squeak that is heard during cooling cycles.

Other signs of worn wheel bearings include uneven tread wear and an increase in steering wheel or vehicle vibration at higher speeds. Excessive vibration may become more noticeable during cornering and braking, which can impact handling and safety. Worn wheel bearings can also cause premature wear on other components like struts and rotors.

Improper storage or handling is another leading cause of bearing failure. For instance, leaving a box of bearings open can expose them to dirt and other contaminants. This contaminates the bearing, which increases friction and heat. It can also reduce the load zone size, which leads to overloading and fatigue.

Poor storage can also lead to improper lubrication, which reduces bearing lifespan. Using the wrong type of lubricant can cause premature wear or corrosion, which damages the bearings. In addition, improper handling can expose bearings to dampness and varying temperatures. Lastly, bearings stored outdoors can be exposed to UV radiation, which can damage the surface of the bearing.

Keeping track of bearing wear is essential to extending the life of this vital component. Regular vibration monitoring can help detect issues before they lead to catastrophic bearing failure. In addition, a documented lubrication schedule can ensure that the right amount of lubricant is used and applied properly. Using high-quality seals and following manufacturer specifications is also crucial to protecting bearings from damage. By catching these problems early, you can keep your AC system running smoothly.

Unpleasant Smells

While cranking up the AC in your home offers a welcome summer oasis, unpleasant smells circulating through the vents signal that something is amiss. From musty mold growth to burning plastic and electrical system issues, funky odors are the first warning signs that your AC may need repair or replacement. Professional air conditioning maintenance addresses odor-producing problems before they escalate into systematic breakdowns.

Musty odors often indicate the presence of mold on the evaporator coil or in ductwork, which needs cleaning or replacement. In more severe cases, the odors could be caused by an overheated compressor or an electrical short in the blower motor. Both of these problems could pose serious safety hazards if you continue to run your system until an AC technician can visit.

If you detect an odor that smells like burning rubber or burnt plastic, it means that one or more components in your unit are on fire. It’s important to turn off your air conditioner immediately and seek emergency services. The smell may also be the result of a pest infestation that requires professional extermination.

A chemical or fishy odor can also mean that the refrigerant is leaking into the unit’s motor or another warm component. This is a major problem that should not be ignored, as some forms of refrigerant are toxic and can harm your family’s health.

An odor that smells of sewer or rotting meat usually means that the condensate drain pan and connected PVC lines are clogged with sewage and debris. This is a serious plumbing problem that requires professional intervention before it becomes a much more serious health hazard.

The stench of rancid eggs may indicate that the air filter is dirty or has not been replaced in a while. A clogged air filter allows the buildup of lint and dirt to reach the inside of the unit, where it can become moist and encourage the growth of unhealthy bacteria and certain types of molds.

It’s crucial to regularly clean or replace your air filter and conduct regular HVAC maintenance in the fall for the heater and spring for the AC to prevent these issues. Additionally, homeowners can prevent odors from developing by keeping the area surrounding their air conditioning units free of trash buildups, sewage leaks, pet waste, rodent nests and other sources that may infiltrate their ductwork.